Profile Templates
A Template is a sample profile which you can use to create Quick or New Profiles (Quick Profile -> Template or New Profile) with pre-set parameters. Tags, proxies, extensions, profile icon, etc. can be added to the template, and they will be used when creating new profiles from a template.
All profile parameters, except the OS, can be edited later, after a profile from a template has been created.
Templates are available with all subscriptions. If a template is set to "active" by any team member, it cannot be deleted. Before deleting a template, it must be deactivated.
Consult our detailed video guide on working with profile templates here:
Creating a template
To create a template, go to the Templates section and click Create Template.

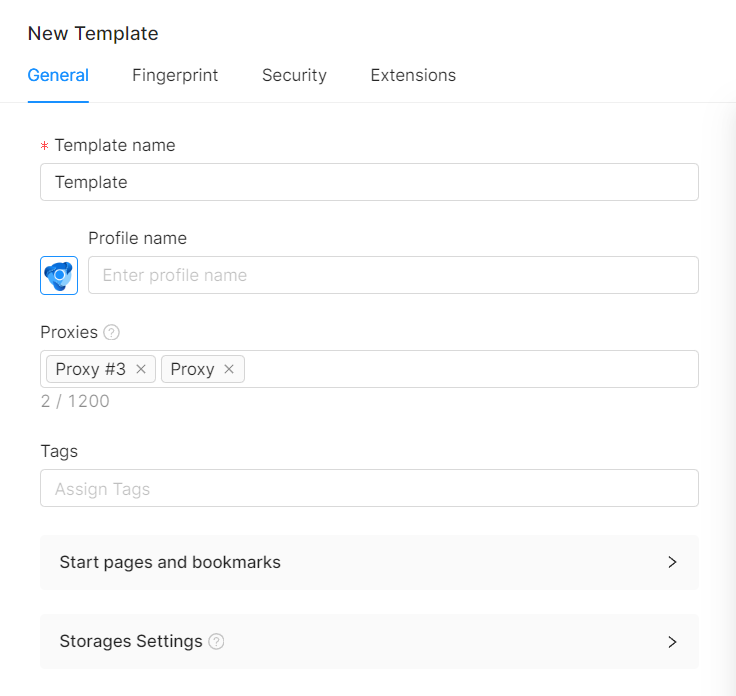
You need to specify the template name on the "General" tab. You can also add a profile name, start pages, bookmarks, change the profile icon, add tags or tag combinations, add proxies, and configure Storage Settings.
The default value displayed as "Add a proxy" will use your real IP address or the VPN IP address, if a VPN is enabled on your device. You can set a proxy from the Proxy Manager list or add a temporary proxy (without saving it to the Proxy Manager list). You can find the list of supported proxies here.
You can also add multiple proxies when creating a template. When a profile is created using such a template, a proxy will be assigned to this profile randomly from the provided template proxy set.
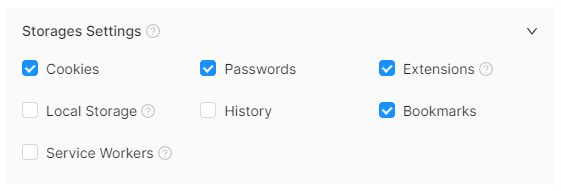
Storages Settings
- Cookies enables cookie and session data saving
- Passwords enables saving passwords
- Extensions enables saving profile extensions
- Local Storage enables saving Local Storage and IndexedDB data
- History enables saving browser history data
- Bookmarks enables saving browser bookmarks
- Service Workers is where some sites store their page cache for offline work or other data
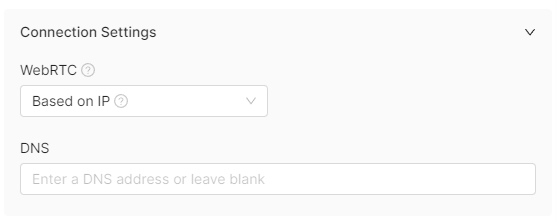
You can set a DNS address and add browser command-line switches in the "Additional Settings" subsection.
DNS is the IP address of the DNS server. By default (if the value is empty), the proxy or VPN DNS server will be used.
Browser startup command-line switches allow you to control browser behavior directly from Octo (e.g., you can block images, disable notifications, and change other settings before launching a profile).
This feature is designed for advanced users who know exactly what parameters they need. If you are not sure if these settings are necessary, we recommend leaving this field blank.
Port scan protection is a built-in mechanism designed to prevent attempts to identify open network services.
Disable images larger than allows you to restrict the loading of images in browser profiles that exceed a specified size. The default value is 10 KB. If this value is set to 0, loading of all images is fully blocked.
We recommend keeping the 10 KB value to avoid issues with the rendering of CAPTCHAs and for correct work of websites where images are required to confirm user actions.
Local profile cache is designed to save traffic when loading previously visited pages and is stored directly on the user's device. This means that if you use another device, its own local cache will be created. It is not possible to manually choose the local cache folder.
You can clear the local cache in your account settings in the "Additional" tab.
In the Fingerprint tab, you can specify a static User Agent (we recommend using the default user agent), operating system, and operating system version. By clicking the "Random" button next to the corresponding field (and thus setting the parameter value), you can specify the screen resolution (for Windows and macOS) or the device type and model (for Android). You can also leave the default values randomized.
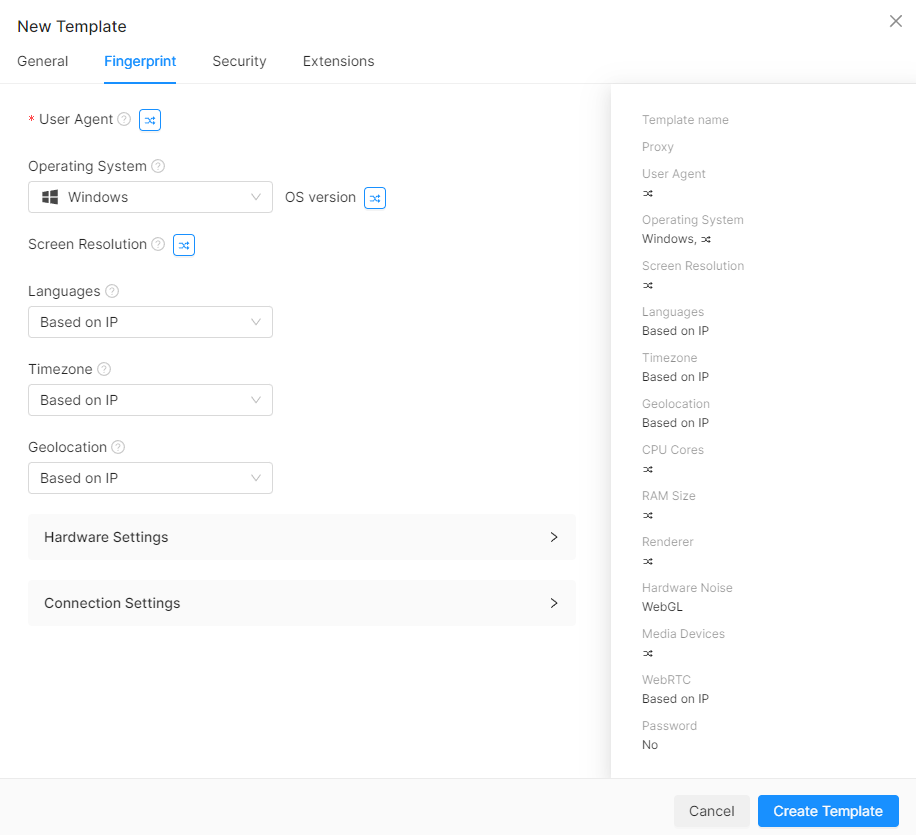
In this tab you can also select the language, timezone, and geolocation settings that will be used for this template.
In the “Hardware Settings” section you can set the number of processor cores, the amount of RAM, the GPU model, and the number of media devices either randomly or statically. Enabling or disabling hardware noise is also a template option. When creating profiles from a template, the noise will be different for each profile.
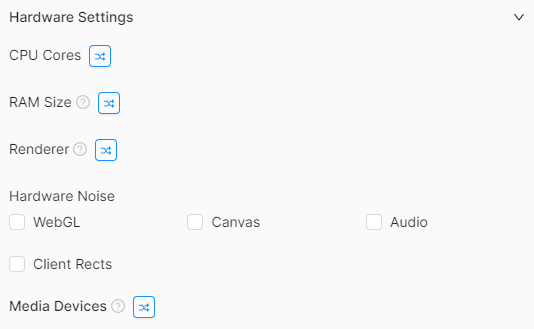
Hardware Settings only apply to Windows and macOS profiles and are not available for Android profiles.
Adding extensions to a template
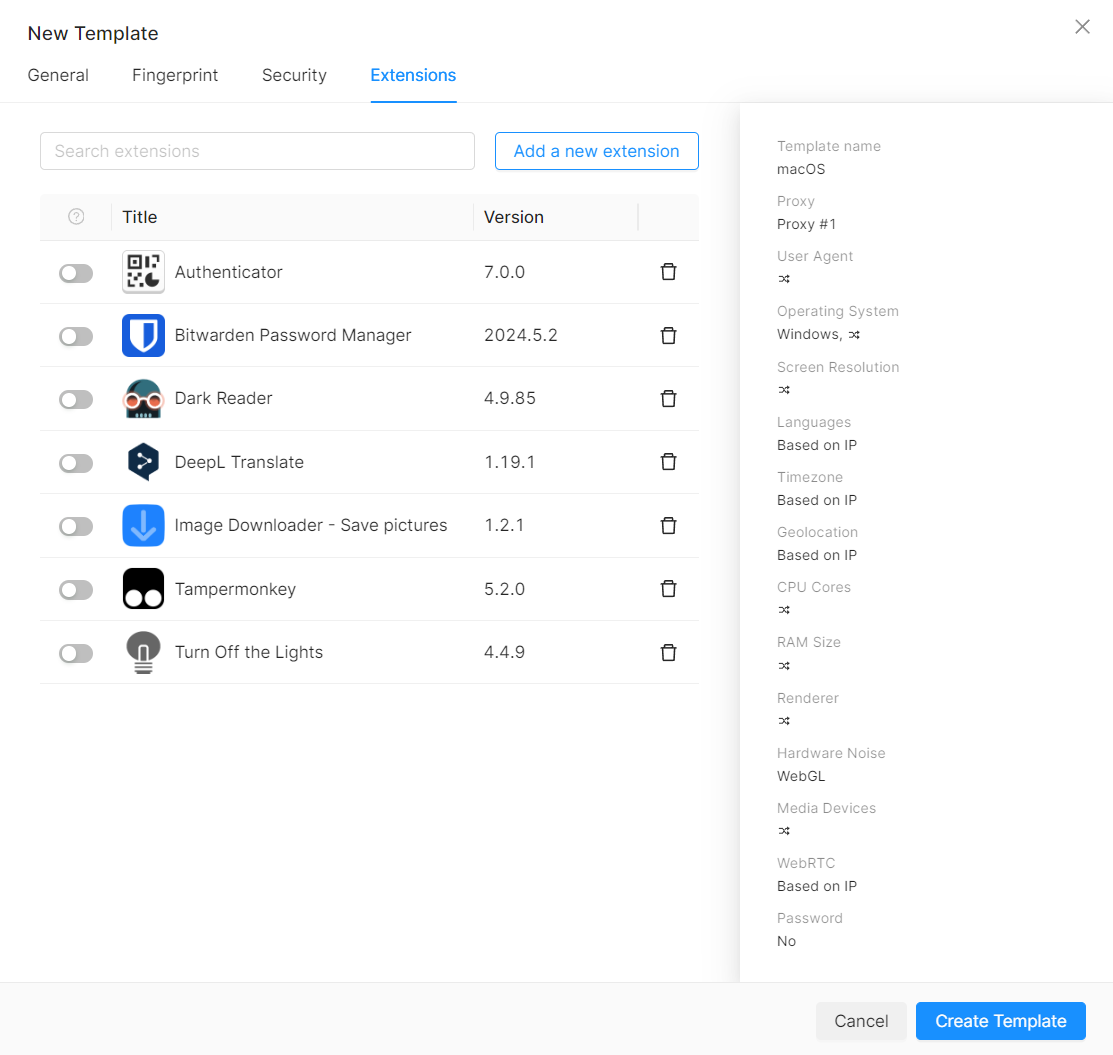
In order for the extensions you need to appear in the Template preset field, you need to install these extensions first in any profile through the Chrome Web Store (before launching a profile to install extensions, make sure that saving extensions is enabled in the Profile Settings -> General -> Storages Settings -> Extensions). Alternatively, you can click "Add a new extension" in the Extensions section of the Template Settings.
Now you will be able to add extensions to a template.
Adding extensions is only possible for Windows and macOS templates, and is not available for Android templates.
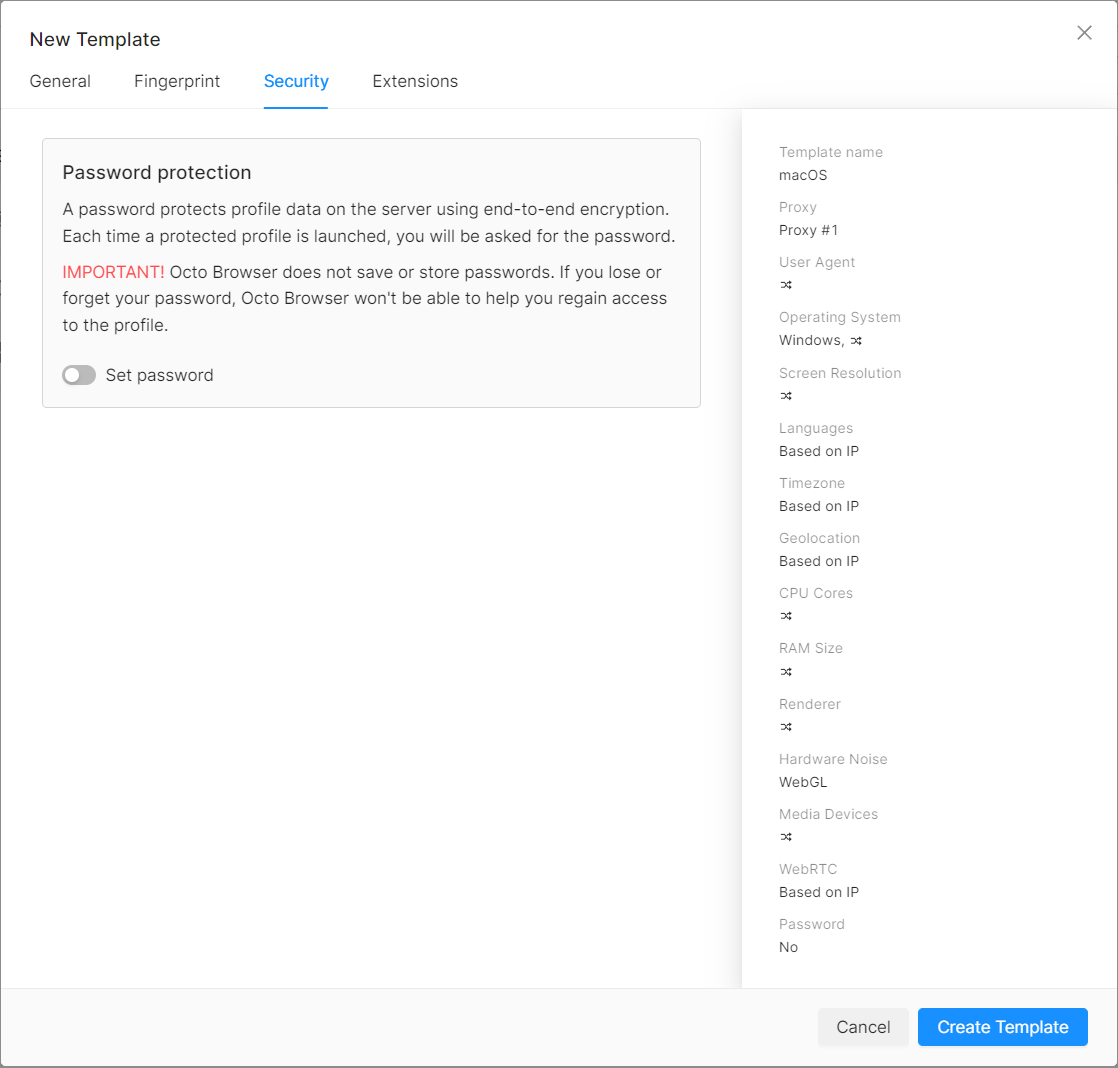
Security
You can pre-set a password when you create a template. In this case, all profiles created using this template will be protected by the template password.
Editing a template
To edit a template, you need to click on the template name. You can edit every setting except the previously selected OS.
Deleting a template
To delete a template, you need to click the "Delete" button to the right of the corresponding template. You can also delete templates in bulk.
Using Templates
To activate a template, you need to enable it (set to Active) on the Templates tab. After that, go to the main page with profiles. You can create a new profile using a template by clicking either Create Profile or Quick Profile ->Template.
The refresh icon (two arrows in a circle) in the upper right corner allows you to refresh the list of templates.
The template list contains the following information about available templates: template name and icon, OS, fixed (manually preset) values, proxy, tags, password, active status (switch between active and inactive), and actions (edit or delete).