Adding AstroProxy Proxies to Octo Browser
Log into your account on the official AstroProxy website.
In the side menu on the left choose "My proxies".

In the Active Ports subsection you can see the data of your active proxies that you'll need to add them to Octo Browser.

3.1. Past the data from the "Server" field into the "Host" field when adding proxy data in Octo Browser. You can use either the first value (the domain), or the IP address.
3.2. Depending on the proxy protocol that you would like to use and you've chosen in Octo Browser, use data in HTTP(S) or SOCKS fields to fill in the Port field.
3.3. Use the "Login" field data to fill in the corresponding "Login" field in Octo Browser.
3.4. Use the "Password" field data to fill in the corresponding "Password" field in Octo Browser.
3.5. The link to change the external IP address can be copied at the bottom right corner of the active proxy by left-clicking it. Then paste this data into the "URL for IP Change" field in Octo Browser.
3.6. You can quickly copy proxy data by clicking on the "chain" icon with the required proxy protocol and port (SOCKS or HTTP(s)).
IMPORTANT!
AstroProxy puts a limit on changing the IP via URL: you can change the IP address once every 30 seconds.

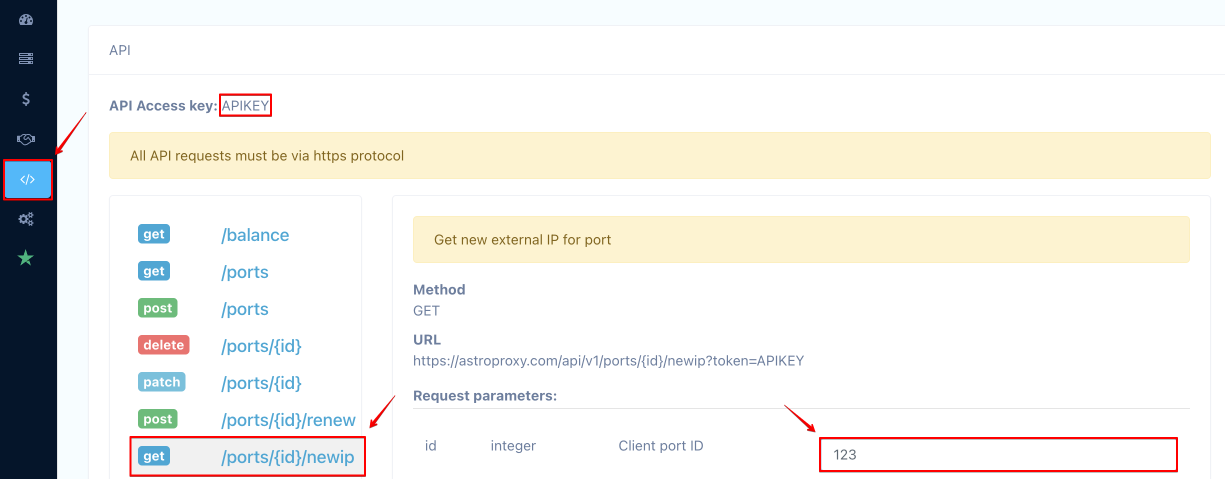
Automate IP change using API. Copy the link with the token in the corresponding tab on the left pane of AstroProxy, selecting the GET method /ports/{id}/newip. Don't forget to specify the port ID in Request Parameters window.
